Ready to build your own mini PC? Don’t worry – this guide has got you covered! Start by gathering the necessary components, from the motherboard and CPU to the RAM and storage devices. Research thoroughly and make sure everything is compatible.
Now it’s time to assemble the key components. Install the CPU, attach the heatsink, insert the RAM modules, and connect the storage devices. Connect them with power cables and place the motherboard into the case. Securely screw everything in place.
Connect external peripherals such as monitors, keyboards, and mice. Power on your mini PC and test it.
Tim’s mini PC project was an inspiring journey of dedication and passion for technology. His enthusiasm for future tech endeavors was fueled by his accomplishments. Start your own mini PC build journey today – you never know what might come out of it!
Understanding Mini PCs
Mini PCs are now popular due to being small and powerful. They offer the same functions as desktops, but in a smaller form. Here’s what you need to know:
- Portability: Mini PCs are portable and lightweight, perfect for those on the go. Students, business people, or travelers, they can take their computing power wherever they go.
- Space-saving: Mini PCs take up very little room, great for those with limited space or who like a minimalist setup.
- Performance: Despite size, these PCs deliver impressive performance. With powerful processors, RAM, and fast storage, they can handle demanding tasks like multimedia editing and gaming.
- Flexibility: Mini PCs are equipped with many connectivity options, like USB ports, HDMI outputs, Wi-Fi, and Bluetooth. This allows users to connect peripherals like monitors, keyboards, mice, and speakers with ease.
Origin story: Mini PCs first appeared in the late 1990s when tech companies wanted to create smaller computers without sacrificing performance. People wanted more compact alternatives, and with advancements in components such as processors and storage, manufacturers created even smaller models with more power and storage capacity.
Mini PCs are now popular for home entertainment, digital signage, industrial automation, and more. As technology advances, the mini PC market will keep growing and providing innovative solutions for those needing compact computers.
Planning Your Mini PC Build
Planning a mini PC build is essential. It helps create a powerful, efficient system that fits your needs. Whether you are a gamer, content creator, or just want a compact and high-performance PC, careful planning is key. Here are 5 points to consider:
- Purpose: What is the primary purpose of the mini PC? Is it for gaming, video editing, or everyday tasks? Knowing this will help select the right components.
- Budget: Set a budget to get the best balance between cost and performance. Research and compare different options.
- Size & Form Factor: Mini PCs come in various sizes & forms. Think about the space and choose one that fits.
- Compatibility: Make sure components such as motherboard, CPU, GPU, RAM, storage, and PSU are compatible.
- Future-proofing: Select components that allow flexibility. Consider expandability, upgrade options, and compatibility with future tech.
Remember, everyone’s needs differ. Take time to research specific configurations based on desired performance and preferences.
Mini PC builds have grown in popularity due to technology advancements. Smaller form factors make powerful PCs accessible. This has fueled innovation by manufacturers, meeting the needs of consumers. Mini PC builds are now prevalent in today’s tech world.
Selecting the Right Mini PC Components
Selecting the ideal components for your mini PC is key for amazing performance. Here’s a guide to help you make the best choices:
| Component | Description |
|---|---|
| Motherboard | Connects parts & checks compatibility. |
| Processor | Determines the speed & performance. |
| Memory | Offers temporary storage. |
| Storage | Sets capacity & speed of data retrieval. |
| Graphics Card | Boosts visuals for gaming or graphics. |
| Power Supply Unit (PSU) | Powers all components. |
| Cooling System | Keeps the mini PC cool. |
When selecting components, consider size, power efficiency, & budget. CPU socket types must match between the motherboard & processor. For example, an LGA 1151 motherboard works with processors that have an LGA 1151 socket.
Did you know? An SSD can help boot times & system performance, according to Techradar.
Assembling Your Mini PC
When assembling a Mini PC, take extra care. Here are 3 steps to follow:
- Choose the components right: Select a small motherboard, processor that fits, and enough RAM for a good performance.
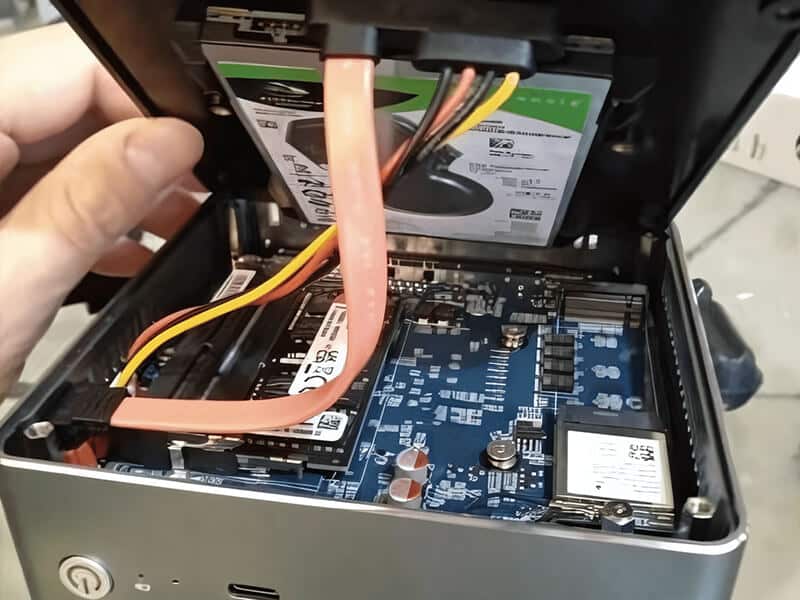
- Connect the components: Insert the processor in the socket on the motherboard. Then, attach RAM modules and fix them. Also, connect the storage devices and power supply unit.
- Secure everything in the case: Remove any brackets or panels from the mini PC case. Put the motherboard inside and screw it firmly in place. Install extra components like graphics cards & cooling systems if needed.
Also, look into cable management to make sure air can flow and nothing gets cluttered. Spend time to make sure everything is connected properly.
Someone who built their first mini PC said: “I was filled with excitement and worry when I started. But, when I hit the power button and saw it work, it felt amazing!”
Installing the Operating System
Installing an OS is a must for mini PCs. It helps you interact with your machine. Here’s a guide to help you go through the process:
- Prep the installation media: Get the OS files from the official website or buy a physical copy. Have a USB drive or DVD to make a bootable installation media.
- Plug in the installation media: Connect the USB drive or insert the DVD to the mini PC’s appropriate port. Make sure your computer recognizes it as the main boot device.
- Boot from it: Restart the mini PC and get to the BIOS settings. Press the designated key during startup, e.g. F2 or Del. Change to the “Boot” tab and make your USB drive or DVD the first boot option.
- Follow on-screen instructions: Boot from the installation media and you’ll see the instructions for your chosen OS. Follow the prompts like selecting language, agreeing to the license, and choosing installation options.
- Complete installation & setup: After selecting the options, wait for the OS to install. After that, you may be asked to set up user accounts and network settings. Follow the steps.
Remember to upgrade your OS regularly for better security and performance.
Keep in mind that some special software may have extra steps for the OS installation. Check their documentation or support for tailored guidance.
Fun Fact: A StatCounter survey in November 2020 shows that Windows has over 75% of the global OS market share.
Setting Up Your Mini PC
Ready to get your Mini PC up and running? Follow this guide for a hassle-free experience.
- Connect the cables: Plug in the power cable to an outlet. Then attach the HDMI or DisplayPort cable to your monitor or TV. Don’t forget to connect the Wi-Fi antenna, too!
- Insert the storage drive: Open the Mini PC case and locate the storage drive slot. Put in your chosen drive – SSD or HDD – and make sure it’s securely connected. Close the case.
- Turn it on and set up: Switch on the power button. Follow the on-screen instructions to complete setup. You’ll choose the language, create user accounts, and connect to a network if needed.
Each model of Mini PC may have different setup procedures, but these steps should work in most cases.
Pro Tip: Read through the manual or online documentation for any specific setup instructions or troubleshooting tips that apply to your device. This will help you avoid any unexpected issues later.
Conclusion
Mini PC building can be fun and doable! By reading this guide, anyone can put together their own mini powerhouse. The awesome thing about mini PCs is that they are customizable. This guide outlines the basics, like selecting compatible parts, being careful with small components, and making sure cables are tidy. Thermal management is key with these smaller systems, as they generate more heat than normal desktops. To prevent overheating, liquid cooling or ventilated cases can help. As TechRadar reports, mini PCs offer the same power and speed of larger computers. Despite their size, these machines can multitask like pros!
Additional Tips and Resources
The Additional Tips & Resources section provides great tips to improve your mini PC-building experience.
Here are some essential ones:
- Choose the Right Components: Pick components that go together, meet your needs and are of high quality. Research before you make any decisions.
- Optimize Airflow: Mini PCs can heat up quickly. Keep them cool with efficient fans, heat sinks & airflow optimization.
- Cable Management: Keep your mini PC neat & organized. Route cables properly & use zip ties or cable clips.
You should also consider the Power Supply Unit (PSU) Wattage. Calculate the power consumption of your components to make sure your chosen PSU is up to the task.
It’s interesting to note that mini PCs emerged in the late 1990s. As technology advanced, people wanted smaller, more portable computers. That’s when mini PCs were born.
Frequently Asked Questions
1. Can I build a mini PC if I have no prior experience with computer assembly?
Answer: Yes, building a mini PC is a feasible task even for beginners. With the right guide and components, you can easily follow step-by-step instructions to assemble your own mini PC.
2. What are the essential components required for a mini PC build?
Answer: The core components needed for a mini PC build are a motherboard, CPU, RAM, storage (SSD or HDD), power supply, and a small form factor case. Additional components such as a graphics card or Wi-Fi card may be included depending on your needs.
3. Are there any size limitations for components in a mini PC build?
Answer: Yes, mini PCs have size constraints, especially in terms of the case and graphics card. Make sure to choose components that are compatible with the size restrictions of your mini PC case.
4. How do I ensure proper cooling in a mini PC build?
Answer: Cooling is crucial for any PC build, especially in compact mini PCs. Ensure proper airflow by using small form factor cooling solutions, choosing components with low heat output, and strategically placing fans or liquid cooling systems within the case.
5. Can I upgrade components in a mini PC after the initial build?
Answer: Yes, most mini PCs allow for component upgrades. However, you need to consider compatibility with the existing components and the available space within the case. It’s essential to plan ahead and choose components that provide upgrade flexibility.
6. Is it cost-effective to build a mini PC compared to buying a pre-built one?
Answer: Building a mini PC can be cost-effective as you have full control over the choice of components, allowing you to prioritize performance or specific features that matter to you. Pre-built mini PCs often come at a premium cost, so building your own can be a more economical option.